Basic Framework.
- Two teams of 4 Guardians compete against each other to see who can kill enemies the fastest, and in the smartest ways possible on their own maps.
- Each team has to “bank” their motes (which are dropped from dead enemies) in a large container in the middle of the map, where there also is a deactivated portal portal.
- Teams race to 100 to summon a “Primeval” that must be destroyed to achieve victory.
Pretty straight forward, so let’s get into the details.
Firstly, your light does not really play a huge factor. I have read on Reddit that it does in the PvP aspect (which I will get to later), but I am going to argue that light plays a ridiculously small aspect in that it’s negligible.
So, when Gambit is about to begin, the Drifter walks in and plays with a coin that will determine what type of enemy you are going to go against. The types of enemies are: Fallen, Vex, Hive, Cabal and Scorn. There is one type of enemy that both teams always must deal with and that is The Taken. After the enemy type is determined, you will head to a “ready” area like you’re at Laser Quest. Drifter again talks some garbage about wanting a pet and the Ascendant Plains while you stare into the eyes of your opposition. I used to taunt them by pointing at them and crying, even though I would go through losing 3 consecutive games before I would finally get a team and crush opponents.
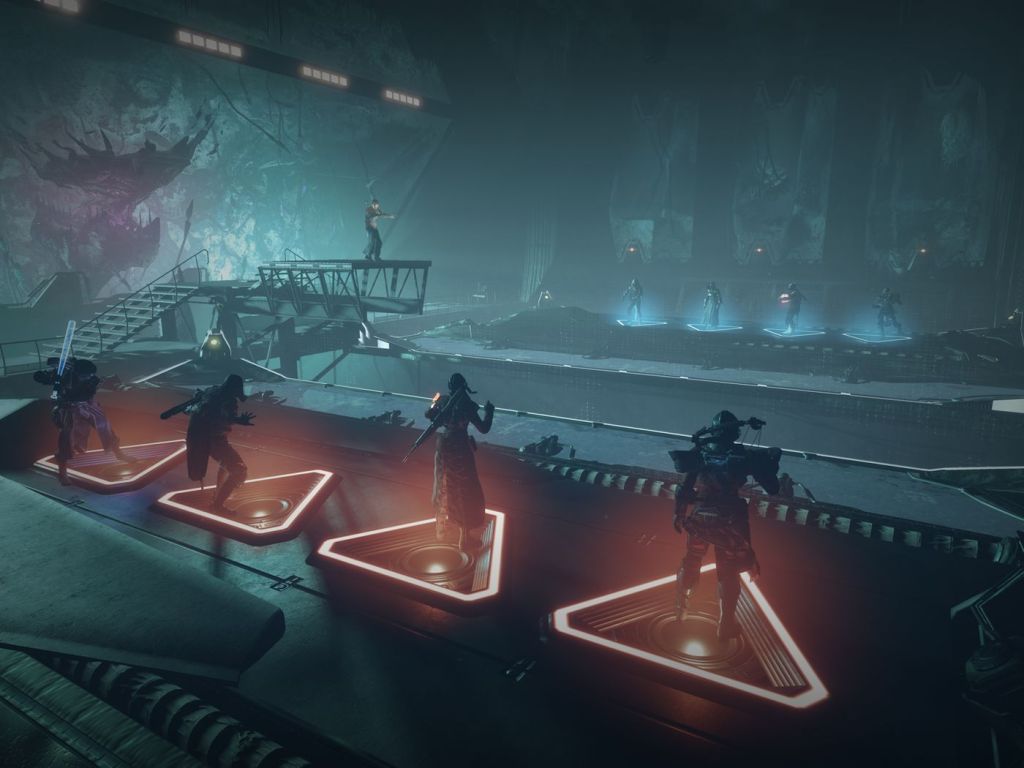
Different enemies have a different number of motes on them, usually denoted by the difficulty of the enemy. Sometimes there are these enemies that are engulfed by or glowing white, and usually these are relatively easily defeated and contain 5 motes. There are also enemies which are not easily defeated, glowing white, yet continuously drop motes when damaged a small amount, and then once they are beaten, they again drop a group of motes (I think it’s like 5 or 3). When the first wave of enemies spawn, they aren’t really that difficult, though they can kill you if you’re not careful; the enemies gets to be tough around the 3rd wave, maybe the toughest at the 4th, and they just stay tough throughout the match. On each map (there are three maps total) there are three areas from which enemies will spawn from, left, in front of and to the right of your bank. They each have their own specific names, Drifter will call out where the waves of enemies are going to spawn next, so listen (there are times where I run into uninhabited territory, which makes me look like a drunk).
Banking motes in groups of 5, 10 and 15 (15 is the maximum you can carry) sends a small, medium or large Taken “blocker” to the other side, respectively. If you manage to get 3 or more blockers on your opponents’ side, the bank starts “bleeding” motes, meaning the team will start losing motes that they have already banked. The taken blockers are called this, for the obvious reason, that when they are on your side, you cannot bank any motes that you have on you, your bank goes into the ground and is closed until you eliminate the blockers. There is a catch, that most Destiny players already know, when your character dies, you lose all the motes that you had. Which sucks if you were at 14 and going for that one mote, and some lame knight comes out of no where and swings his big, long Hive sword at you, killing you and your motes. It takes usually around 30 seconds for a respawn as well, that’s a long time to leave your team hanging, Brotha’!
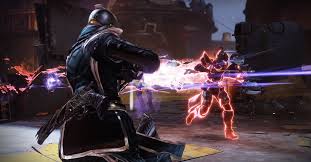
When your bank gets to a total of 25 motes, you activate a portal, and you can now go and invade the opposing side. Doesn’t matter who chooses to invade, but when you or one of your teammates goes through the portal, you spawn on the opposing teams map, you will be able to see these counters above their head denoting how many motes they have. They won’t be able to see you the same way, but your character is wrapped in a glowing red aura, which has a fairly visible trail that follows you and a distinct audible noise that they can hear when you are close and gets louder as you get closer. This is the PvP part of Gambit, which I referred to earlier, where some people say that your light level matters. I believe it does, because I have been light level 1180 and taken out an entire team of players 1250 and higher, and I have had a player sporting the Stubborn Oak Hand Cannon take me out when I was 1220 and he was a mere 1160. This game can be chaotic, if you plan your game right you can wipe their entire team as well as draining a great deal of motes.
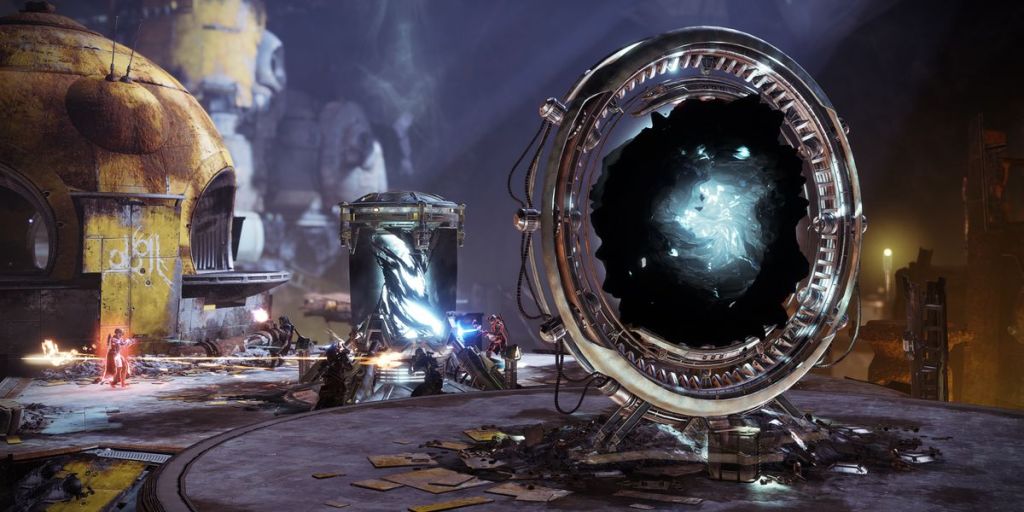
This game of cat and mouse happens continuously until you reach 100 motes, upon which you summon the Primeval. When the prime evil spawns, there will be a taken convoy with him, that are ridiculously tough in the beginning, but as you beat them and they respawn, they are dirt off the shoulder. The real issue becomes the opposing team still being able to send blockers and invade, if an invader kills you, you heal a portion of the Primeval. Also, small blockers can shield their allies, even the Primeval, and there are times where the Primeval as well as the convoy will be shielded by some floating ball of magical ability. Just shoot the ball and destroy it, so the shields come down.
And that’s my Gambit explainer, I hope it was helpful, and not confusing. There are a lot of finite details that may change the way you play, you just have to explore the game and the different maps, the types of enemies and your strategies should be already made for you. I’d give you hints, but I’m probably going to be playing against you.